Configure Selenium WebDriver with Java and Eclipse
 LetsKodeIt
Selenium 4 Setup With Java And Eclipse | Download And Install | Selenium 4 Installation
Introduction:
Selenium WebDriver is a powerful tool for automating web browsers, enabling you to interact with web applications and perform automated testing. In this blog post, we will guide you the basic setup for beginners how we can configure the Selenium WebDriver jars in Eclipse. through the complete setup process for Selenium WebDriver. By following these steps, you'll be ready to start automating your web testing tasks in no time.
- Download Selenium WebDriver JARs
- Open Eclipse and create a new Java project
- Configure the project build path
- Add Selenium WebDriver JARs to the build path
- Verify the added JARs
- Create a new Java class
You can also watch the video for completing the setup:
STEP 1 - Download Selenium WebDriver JARs:
Visit the Selenium official website (https://www.selenium.dev/downloads/) and download the latest Selenium WebDriver JAR files.
On google we just have to type Selenium WebDriver and here we will see the official link of Selenium WebDriver "www.selenium.dev" we just have to go on that website
and then we will go to the Downloads, Click on the Downloads
Selenium clients and WebDriver Language Bindings
Here we have to Download the latest version of java files
646c9407c40bb_lg.png)
- Always make sure to download a stable version.
- Go to the download folder, unzip the downloaded file.
- Create a folder with name "selenium-jars" and save the extracted files in the created folder.
STEP 2: Open Eclipse and create a new Java project
- Click on New > Java Projects > Enter the name for the Project.
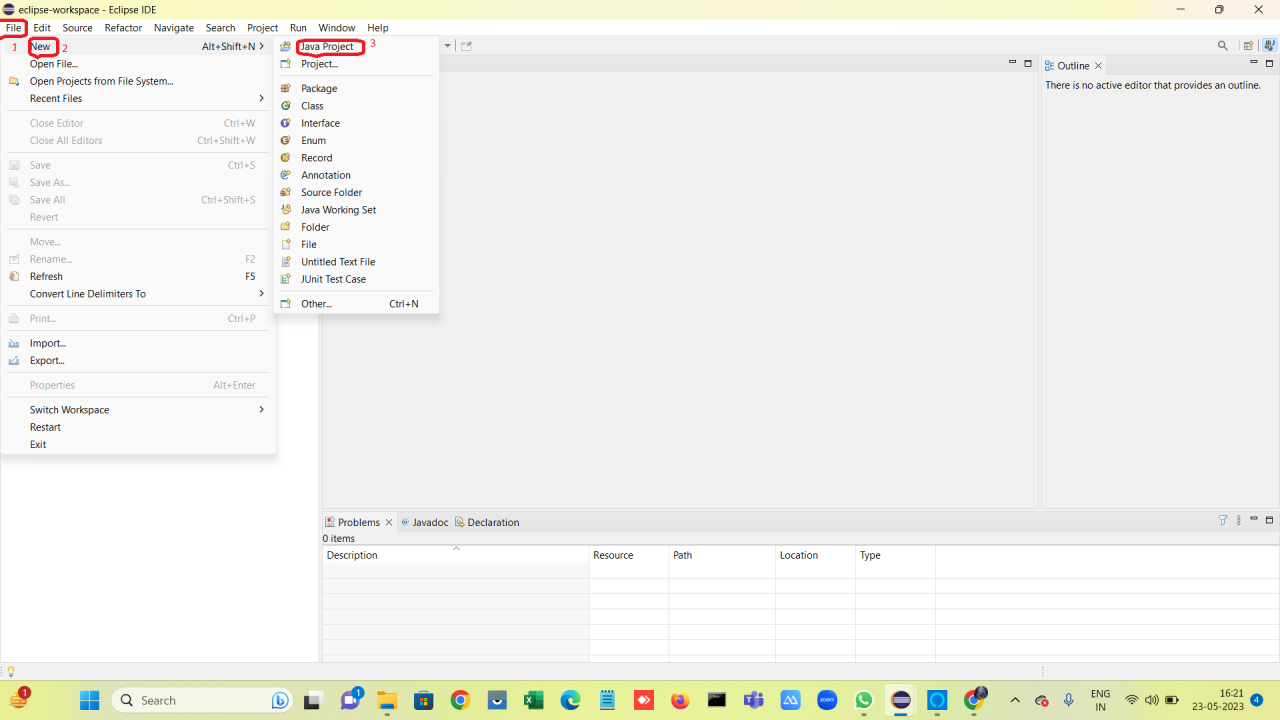
- Uncheck the Module Checkbox.
- Click Next, then click Finish. Your project will be created.
646c9d6e539b9_lg.png)
Create a new package under the project:
- Click on src(source) folder > New > package.
- Enter a name for the Package.
- Click Finish.

Create a new Class:
- Right click on package > New > Class > Enter Class name
- Click Finish.
647db2fd6d5b8_lg.png)
STEP 3: Configure the project build path
Click on Project > Right Click > Properties > java build path
647db947d758f_lg.png)
647f003beaa9d_lg.png)
STEP 4: Add Selenium WebDriver JARs to the build path
- Go to the java build path
- Go the libraries
- Select the classpath
- Add External JARs
- Go the folder where we save the JARs files
- Under the folder click on lib folder (There is another lib folder under the folder)
- Select the all the files under the lib folder
- Click on Open
- It will Add all the files we selected

STEP 5: Verify the added JARs
- Again click on Classpath
- Again click on External JARs files
- Go back out of the lib folder
- Select all the java files from there
- Unselect the lib folder
- Click on open
- Click on apply and close
647f082459681_lg.png)
Now our eclipse will know that we have Selenium JAR files added to the project
On the left side you will see referenced libraries
Right click on it and you will see all the JAR files we added
647f0a8c23e1f_lg.png)
STEP 6: Create a new Java class
- Click on WebDriver and FirefoxDriver
- We will notice a red underline there
- Take mouse on WebDriver and FirefoxDriver
- It will shows an option import "WebDriver" (org.openqa.selenium.remote), Click on it.
- It will add a Import statement top of the class
- You will notice red line from this is gone
647f14b97f2ec_lg.png)
647f14d6c6375_lg.png)
First setup for the project is completed and First class has been created
Categories: : Selenium WebDriver Java